
© Original recipe by Flavor & Folklore ©
Easy Halloween Peanut Butter Spider Cookies 🕷️🍪🍫
1. Introduction
If you’re looking for a fun and spooky Halloween treat that the whole family will love, these Halloween cookies are perfect! These spider cookies combine rich peanut butter with a fun creepy design, making them an ideal addition to any Halloween party or a festive snack for kids. Not only are they easy to make, but they also add a touch of playful fright to your fun Halloween dessert spread. Ready to create these adorable treats? Let’s dive into the recipe!
2. Ingredients
- 1 cup creamy peanut butter
- 1 cup granulated sugar
- 1 large egg
- 1 teaspoon vanilla extract
- Black candy melts or chocolate chips (for the legs and body)
- Mini chocolate chips (for spider eyes)
- Optional: orange or purple sprinkles for extra festivity
3. Step-by-step Instructions for Making Halloween Peanut Butter Spider Cookies
Preparing the Cookie Dough
Start by preheating your oven to 350°F (175°C). In a mixing bowl, combine 1 cup of peanut butter, 1 cup of sugar, the egg, and vanilla extract. Mix until smooth and well combined. This simple process creates a rich and chewy base for your spooky cookies.
Forming the Cookies
Using a tablespoon or cookie scoop, portion out the dough and roll into balls. Place them on a baking sheet lined with parchment paper, leaving about 2 inches between each cookie. Flatten each ball slightly with the back of a fork or your hand for an even surface.
Baking the Cookies
Bake in the preheated oven for about 10-12 minutes until the edges are golden. Remove from the oven and allow to cool for a few minutes on the baking sheet, then transfer to a wire rack to cool completely.
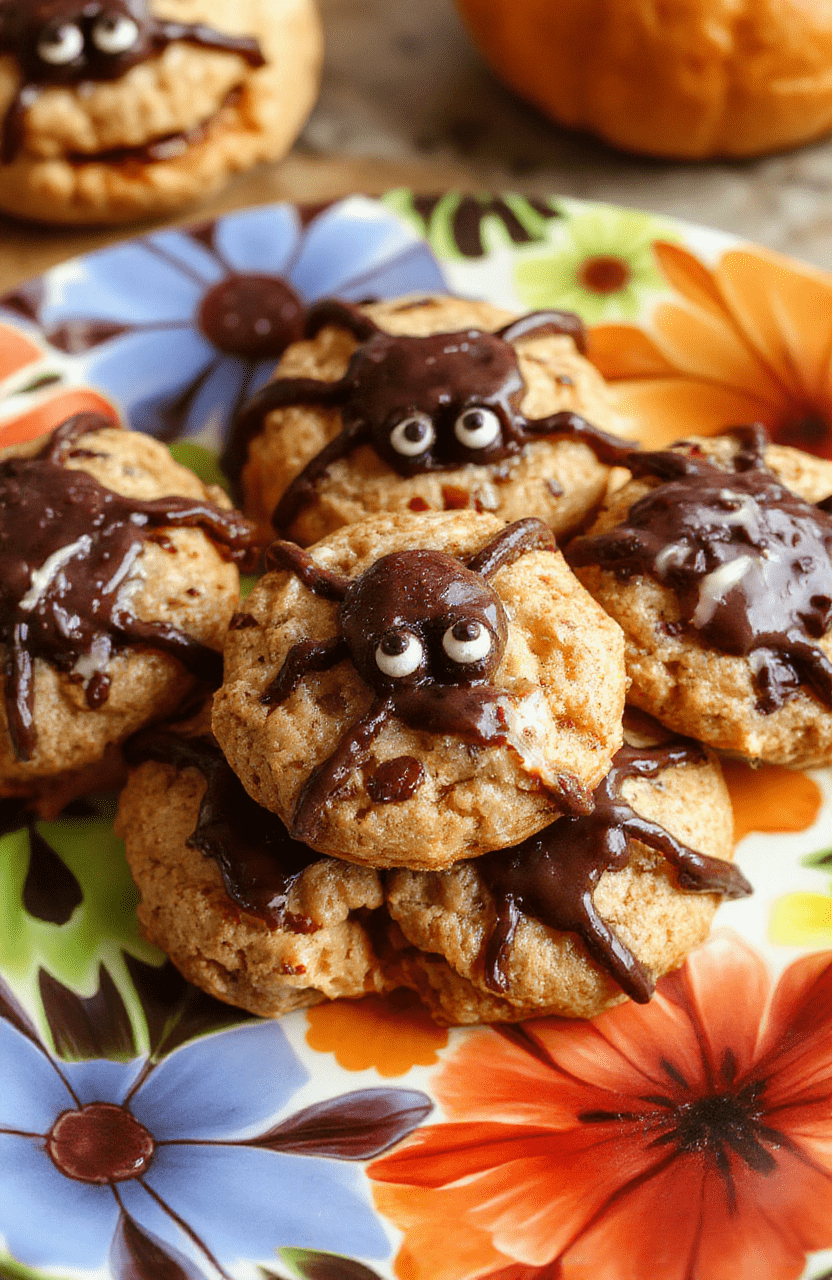
Creating the Spider Legs
While the cookies cool, melt the black candy melts or chocolate chips using a microwave or double boiler. Using a small piping bag or a plastic sandwich bag with the tip cut off, pipe the spider legs onto a piece of parchment paper. Create 8 legs per spider, making each leg about 2 inches long. Let the legs set completely.
Assemble the Spiders
Once the cookies are cooled and the legs are set, attach the legs to each cookie using a small dab of melted chocolate or candy melts. Place the spider’s body on top of the legs — you can use a larger candy melt or a shaped chocolate piece. Add mini chocolate chips as eyes to give your spider cookies a cute yet spooky appearance.
4. Storage Tips for Your Halloween Treats
Store your Halloween cookies in an airtight container at room temperature for up to 3 days. For longer storage, keep them in the refrigerator for up to a week. If you want to keep the spider legs crisp, add the legs just before serving or store the cookies with the legs in a separate container and assemble right before presentation.
5. Serving Suggestions and Presentation Ideas
Arrange your spider cookies on a spooky platter lined with plastic cobwebs or themed Halloween paper. For an added creepy effect, place them among faux spider webs or around a cauldron of dry ice fog. These cookies are sure to be a hit as a fun Halloween dessert or as part of a Halloween treats table.
6. Frequently Asked Questions (FAQs)
Can I use natural peanut butter instead of creamy peanut butter?
Yes, but keep in mind that natural peanut butter might contain more oil, which could affect the consistency. Adjust the amount of sugar if needed to maintain the right dough texture.
Are there gluten-free options for these Halloween cookies?
Absolutely! Use gluten-free peanut butter and gluten-free candy melts or chocolate chips. Make sure to check all ingredients for gluten-free certification.
How long does it take to make these spider cookies?
Including baking and assembly, expect around 30-40 minutes for this fun Halloween dessert. The most time-consuming part is decorating the legs and assembling the spiders.
Can I make these cookies ahead of time?
Yes, prepare and bake the cookies in advance, then assemble the spiders just before serving to maintain the crispness of the legs.
7. Kitchen tools that you might need for this recipe
Enhance your Halloween baking experience with these handy tools! The Compact 6-in-1 Digital Air Fryer is perfect for quick melting of candy melts, while the Ninja Foodi Smart XL Indoor Grill & Air Fryer helps you cook efficiently and evenly. For precise decorating, a small piping bag or squeeze bottle will make piping legs a breeze. Additionally, a T-fal 14-Piece Nonstick Cookware Set ensures you have all the essentials for baking and decorating.
8. Conclusion
These Easy Halloween Peanut Butter Spider Cookies are a delightful and whimsical way to celebrate Halloween. With their charming spider design and delicious peanut butter flavor, they’re guaranteed to be a crowd favourite. Whether you’re baking with kids or impressing party guests, these Halloween treats are simple, fun, and sure to add a spooky touch to your festivities. Get creative with your decorations, and enjoy making these creepy-cute cookies!