
© Original recipe by Flavor & Folklore ©
😋 Fluffy Garlic Rolls: The Perfect Side Dish for Any Meal
1. Introduction
If there’s one side dish that instantly elevates any meal, it’s garlic rolls. The aroma of buttery, crispy-crusted garlic rolls awakens your senses and promises a burst of savory flavor with every bite. These soft, fluffy dinner rolls are not just a staple for Italian dinners—they’re versatile enough for brunch, a casual lunch, or even guest entertainment. Their warm, fragrant layers make them a must-have on your bread basket, and they pair beautifully with everything from pasta to roasted vegetables.
2. Why You’ll Love This Recipe
- Ready in 30 minutes — Perfect for weeknights when you’re craving something warm and satisfying.
- Soft and fluffy texture — These garlic bread rolls boast a melt-in-your-mouth quality that you’ll want to nibble all day.
- Envelope of aromatic garlic and herbs — Every bite fills your home with irresistible, savory scents.
- Versatile side — Ideal alongside pasta, salads, or as a standalone snack.
3. Ingredient Notes
High-quality ingredients truly make or break a recipe, especially with garlic rolls. Opt for fresh, unsalted butter for that rich, creamy baseline, and choose high-quality garlic—fresh garlic cloves provide the most vibrant, aromatic flavor compared to pre-minced versions. Customizing the herbs—like fresh parsley or basil—can add a bright, fresh dimension to your garlic bread. Use fresh yeast if making the dough from scratch, or for a quicker option, store-bought dough can be flavored beautifully with the garlic butter mixture.
4. Kitchen Tools You Need
For best results, investing in quality kitchen tools makes the process smoother. A Compact 6-in-1 Digital Air Fryer not only helps in baking smaller batches but also ensures even heat distribution, perfect for soft, evenly baked rolls. A T-fal 14-Piece Hard Anodized Nonstick Cookware Set provides a sturdy surface for mixing and kneading, while a stand mixer like the KitchenAid Artisan 5-Quart Stand Mixer simplifies kneading the dough to fluffy perfection.
5. How to Make Fluffy Garlic Rolls
Prepare the Dough
Begin by activating your yeast in warm water with a pinch of sugar. The mixture should become frothy, signaling active fermentation, which typically takes about 5 minutes. While waiting, whisk together your flour, salt, and a touch of sugar. When the yeast is ready, combine it with warm milk, melted butter, and eggs, then slowly mix in the dry ingredients. Knead until the dough becomes smooth, elastic, and slightly tacky—this generally takes about 8-10 minutes using a stand mixer or by hand. Cover and let it rise until doubled in size, about 30 minutes, until the dough is airy and soft.
Forming the Rolls
Gently punch down the dough and turn it onto a floured surface. Divide into equal portions and shape into rounds. Arrange them evenly in a greased baking dish or on a parchment-lined tray. Let them rest for an additional 10 minutes—this ensures they become super fluffy upon baking.
Garlic Butter Coating & Baking
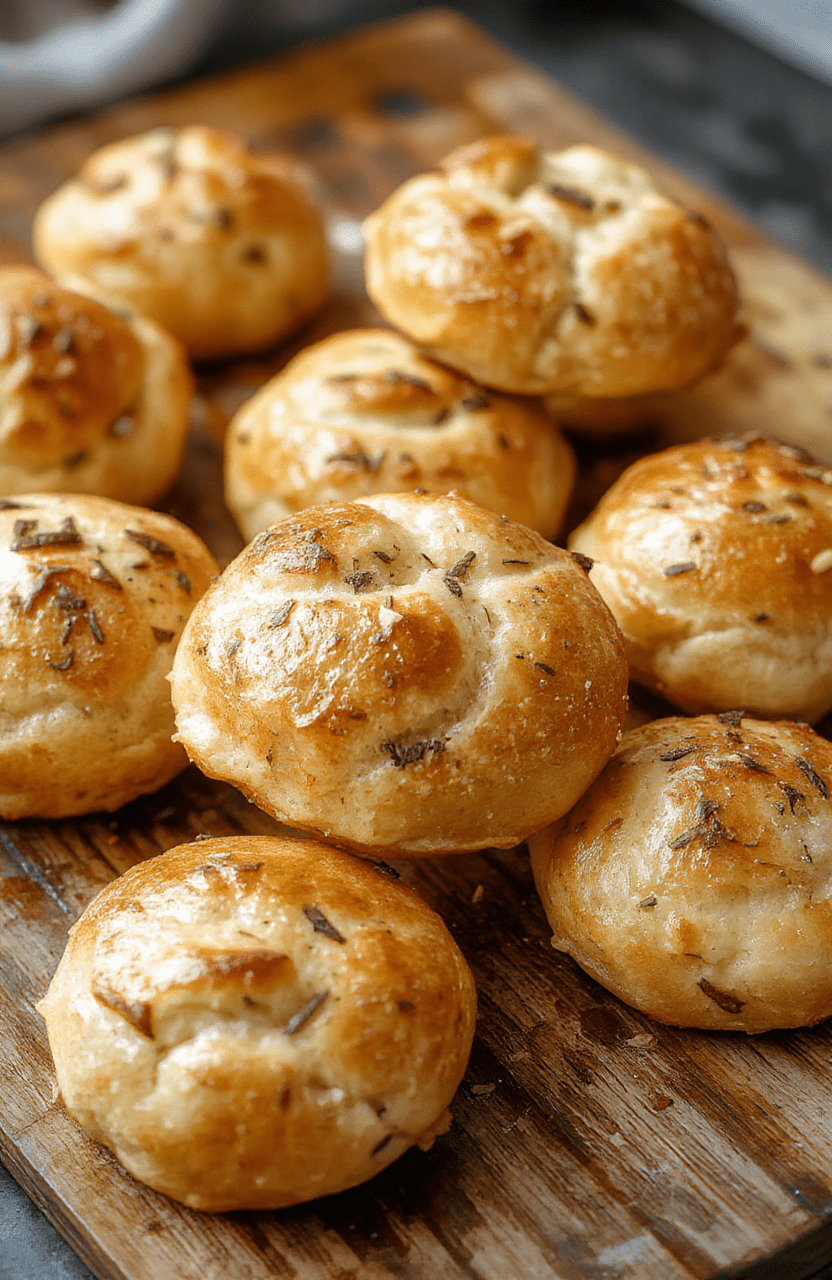
Meanwhile, melt butter and mix in freshly minced garlic, chopped parsley, and a pinch of salt. Brush this fragrant mixture generously over each roll. Bake at 375°F (190°C) until golden brown, about 15-20 minutes. Your kitchen will fill with the irresistible aroma of baked garlic and butter—don’t be surprised if your house smells better than a bakery!
6. Expert Tips for Success
- Ensure your yeast is fresh and activated in warm (not hot) water to prevent killing it.
- Don’t skip the resting periods; they develop the dough’s lightness and flavor.
- Brush the garlic butter on multiple times during baking for a glossier, more flavorful crust.
- If you prefer a crispy crust, broil for a minute or two at the end of baking, keeping a close eye to prevent burning.
7. Variations & Substitutions
For a dairy-free version, use olive oil or a vegan butter alternative in your garlic butter. Add grated vegan cheese to the dough for a cheesy twist. If you’re allergic to garlic or prefer milder flavors, infuse the butter with herbs like rosemary or thyme instead. For gluten-free fans, replace traditional flour with a certified gluten-free blend, and ensure your baking dish and utensils are free from wheat contamination.
8. Storage & Reheating
Once cooled, store garlic rolls in an airtight container for up to 2 days. To revive their softness and warmth, reheat in a preheated oven at 350°F (175°C) for about 10 minutes or microwave briefly. You can also freeze leftovers—simply wrap tightly and reheat directly from frozen when needed.
9. FAQ
Can I make garlic rolls ahead of time?
Yes, prepare the dough a day in advance, let it rise, shape the rolls, then refrigerate. Bake fresh the next day for a warm, homemade experience.
What is the best way to get crispy edges without losing fluffiness?
Bake at a slightly higher temperature and brush the rolls with garlic butter multiple times during baking. Broiling for a minute at the end adds crunch without over-drying the interior.
Can I use garlic powder instead of fresh garlic?
Fresh garlic provides a more vibrant flavor, but garlic powder can be used in a pinch—use about half the amount called for in fresh garlic.
10. Conclusion
Nothing beats the comforting allure of fluffy garlic rolls. Soft, aromatic, and irresistibly crispy on the outside, these rolls will quickly become your go-to side dish. With simple ingredients and straightforward steps, you can create bakery-quality garlic bread in your own kitchen. Whether paired with a pasta dinner or enjoyed as a snack, these garlic rolls are a crowd-pleaser—and a guaranteed way to make any meal special.
Print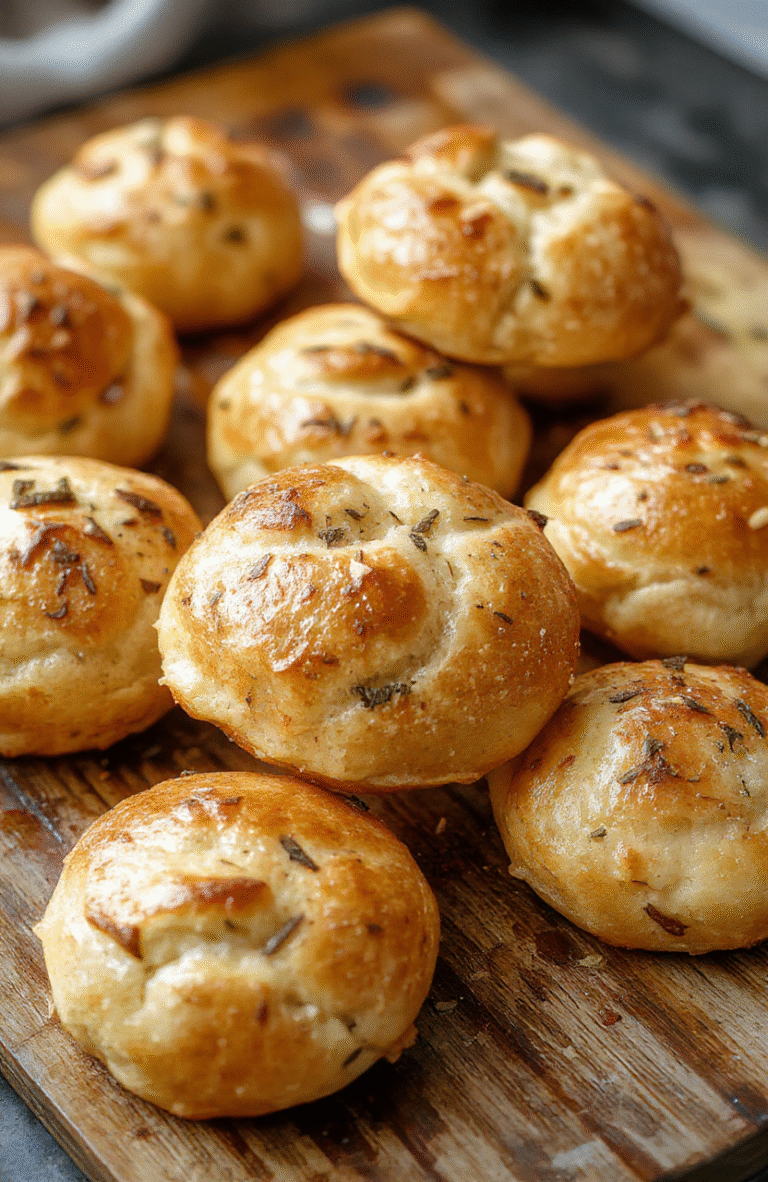
Fluffy Garlic Rolls: The Perfect Side Dish for Any Meal
Fluffy, buttery garlic rolls perfect as a side dish, snack, or bread for any meal.
- Total Time: 2 hours
- Yield: 12 rolls 1x
Ingredients
- 2 cups all-purpose flour
- 1 packet active dry yeast
- 1 cup warm milk
- 4 tbsp unsalted butter, melted
- 2 cloves garlic, minced
- 1 tsp sugar
- 1 tsp salt
- Optional: chopped parsley for garnish
Instructions
- In a small bowl, dissolve yeast in warm milk with sugar. Let sit until frothy, about 5 minutes.
- In a large bowl, combine flour and salt. Add the yeast mixture and melted butter. Mix until a dough forms.
- Knead the dough on a floured surface for about 5 minutes until smooth.
- Place dough in a greased bowl, cover, and let rise until doubled, about 1 hour.
- Preheat oven to 375°F (190°C). Punch down the dough and divide into 12 equal pieces.
- Shape each piece into a roll and place on a greased baking sheet. Cover and let rise for another 20 minutes.
- Mix minced garlic with a tablespoon of melted butter. Brush over the risen rolls.
- Bake for 15-20 minutes until golden brown. Brush with remaining butter and sprinkle with parsley if desired. Serve warm.
Notes
- You can add shredded cheese or herbs to the dough for extra flavor.
- Ensure the milk is warm, not hot, to activate the yeast properly.
- Best enjoyed fresh out of the oven, but leftovers can be stored in an airtight container for 2 days.
- Prep Time: 15 minutes
- Cook Time: 20 minutes
- Method: Baking
- Cuisine: American
- Diet: Vegetarian
Nutrition
- Serving Size: 1 roll
- Calories: 180 Kcal
- Sugar: 3g
- Sodium: 150mg
- Fat: 8g
- Saturated Fat: 5g
- Unsaturated Fat: 3g
- Trans Fat: 0g
- Carbohydrates: 25g
- Fiber: 1g
- Protein: 4g
- Cholesterol: 15mg